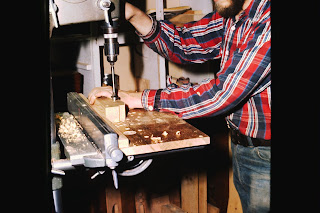
I took over the next step here - drilling the 4 holes that help change the basic shape into a toy car. Here I am drilling the front axle hole. A wooden dowel will form the axle with a wooden wheel on each end. Later, I would develop a system of permanent jigs that would hold our wood parts in place, and always make the holes align in the proper place. In these early days, I am relying on a "fence" to keep the holes the right distance from the bottom of the car, but I am using my pencil marks to align the holes front to back. This is a good time to talk about the Shopsmith multitool that I am using here as a drill press. Elizabeth's grandfather gave us this wonderful tool that could function as a drill press, a lathe, a table saw, a disc sander, and a jointer. Without this great multi-tasking machine, I doubt we would have made it very far with our fledgling business! Years later, I would replace the motor, but this workhorse functioned almost everyday for the whole life of The Toycrafter, and I still have it! I will confess to putting it on Craigslist a while back, but I got no nibbles, and it still sits in our shop!
Above, I am adjusting alignment to make the 1" window hole..... setting the depth very carefully to just poke slightly through the bottom, and then below I am using that tiny hole to align the hole on the opposite side for a nice smooth interior to the window!
Below are 4 Rolls Royces ready for sanding, routing, etc. Elizabeth will take over the next step in my next entry. (There may be a gap of a couple of days here? Tomorrow I get my new pacemaker, and will not have access to my computer till Wednesday, and I'm not sure if I will feel like story telling right away?)


No comments:
Post a Comment