Showing posts with label Quality. Show all posts

Monday, May 18, 2015

Finishing

Above, Elizabeth stamps The Toycrafter name on the bottom of each car.  For years our cars and lots of other toys were labeled with simple rubber stamps.  I still have a rack of the rubber stamps in our current shop.  I'm not sure if we were stamping the year and make of the car on the bottom at this point.
All of the cars, trains, etc. were dipped in a mineral oil finish to make them look nicer without adding any "toxic" finish.  At this point in time we were very focused on keeping our toys all wood, with no paint.  We took all the finished  toys inside our house to a little upstairs bedroom for the mineral oil dip!  I love this picture because you can so clearly see what a huge difference the mineral oil finish made in the look of the toys.  We used pharmaceutical grade mineral oil, and used to joke that if a kid ate the toy, the mineral oil would just help the wood through their system!  The disadvantage of the mineral oil was that it never dries, so over time, any dust settling on our toys on a store shelf formed sort of a gummy layer?  Another disadvantage we discovered was that if we wrapped our toys in newspaper - which we did one time - the mineral oil would dissolve the ink, and you could actually read some of the print on the side of our toys.  This was one of the quality lessons learned from Harmony In Wood when they shipped back a whole box of lovely custom made animals we had created especially for them - unfortunately with little articles from the Ithaca Journal printed on the sides!  In the background you can see a plastic dish of train cars draining, and in the right front, some little toy cars.

Sunday, May 17, 2015

Put some wheels on it, and it is ready to "Rolls Royce".

 OK - Add some axles to those wheels, and you are real close to having a toy!  I think  that is my Grandpa Drake's handmade wooden mallet.  I've got a few things from my Mom's parents, and that mallet is one of my favorites!  The best however, has nothing to do with our toy business - it is the wooden rolling pin that they bought when they got engaged, complete with a hand repair that Grandpa made to it when one of the handle ends broke.
 Above, Elizabeth and I assemble the wheels onto the Rolls Royce cars.  Behind Elizabeth is a pile of airplanes with the wings clamped in place while the glue dries.
 Above, a nice example of some of the very crude jigs we made over the years for various purposes.  This one was just a bit over the width of the car bodies, and the wheels would rest on the sides so we could drill a 1/8" hole through the wheel, and into the axle.  Below, Elizabeth hammers home the little wooden pegs that insured that the wheels would not fall off with hard play!  The little notch in the side of the jig makes a spot for the spare tire to fit once that is in place!
I hope I can find more pictures of some of the many jigs we made over the years.  They were pretty much always pretty crude, and intended to make some oft repeated operation quicker and easier.  I always intended to make nicer jigs later, after I proved that the basic design worked well.  However, I almost never made a new jig as long as the original one was working OK.

Friday, May 15, 2015

Wheels!

(Sidebar - check out the phone attached to the wall, complete with a dial, and a springy cord)
 
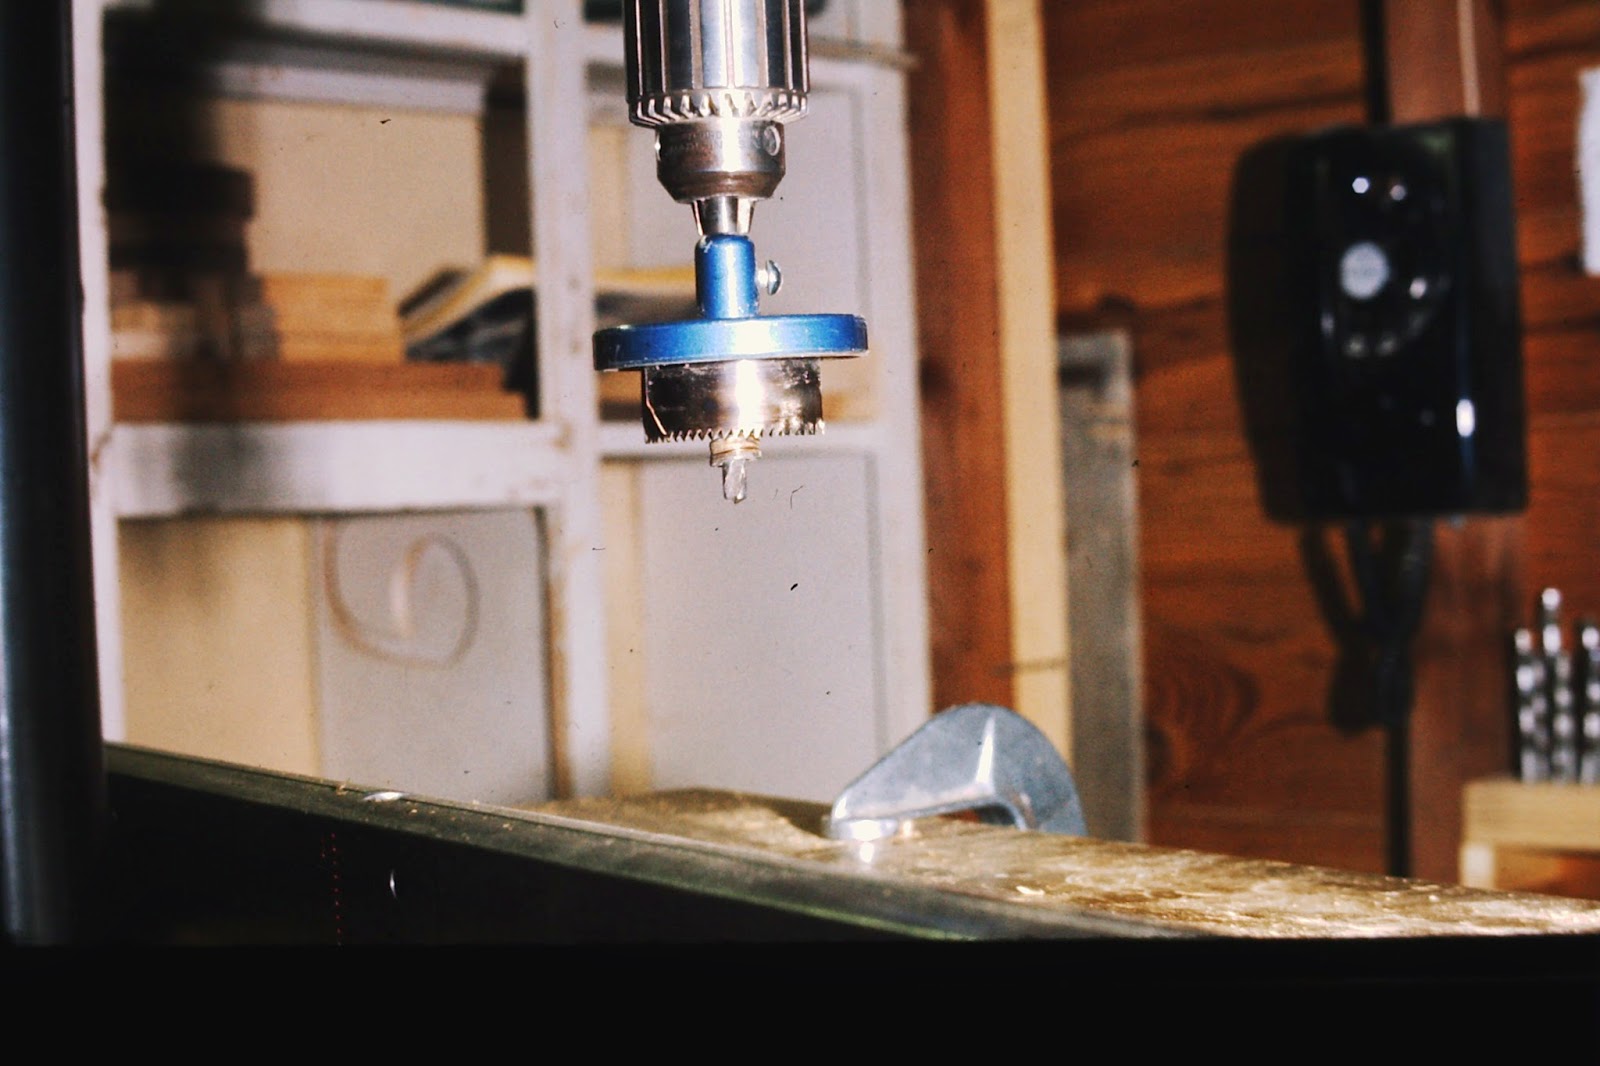
A big part of toy making - especially toy cars, trucks, airplanes, etc. - is wheels.  Our first wheels were made by hand by us using a hole saw.  A drill makes a hole, but sort of peels out the the wood from the hole.  A hole saw has a central small drill to guide the circular saw, and an outer round saw that cuts a circle.... result - a wheel.  Our hole saw had about 6 different saws that could be changed out to create different sized wheels.
 Above, I am setting the fence just the right distance from the edge of the thin wood to be most efficient, and below, the resulting wheel, and the left over scrap.  The main problem with these wheels  was that the edges were pretty ragged.  Our solution was to attach the wheels to the axles and then put them on the car, and then hold them against the vertical sander to spin them to clean up the edges.
 I do not remember who told me that there were companies that actually made wheels that we could buy, but what a change in our business.  Up until the burlap bag below arrived, (actually two burlap bags!)  every Thursday  was "wheel day".  A whole day  each  week was spent cutting out those hole saw wheels.  Below you see me checking out a bag of wheels already made, already smooth, and a lot nicer looking than our hole saw wheels!  I'm don't remember for sure where our first wheels came from, but I think it was W.J.Cowee, in Berlin, NY.  Our other main source of wood turnings over the years was Kingfield Wood Products of Kingfield, Maine!  Some day I will tell the stories of each of these wonderful companies.  Cowee was our biggest supplier over the years, and at one point we were one of their 10 largest customers!  But on this day, we were thrilled by our burlap bags with 5,000 perfect wooden wheels!  Including spare tires, that is 1000 toy cars!  In those days  that was a lot of  wheels!  A few years later, we would be getting up to 100,000 flipover balls, or 20,000 kazoo parts, or 50,000 Easter Eggs!  Now there is a story! Stay tuned!

Monday, May 11, 2015

You want that corner to be nice and rounded and smooth to the touch!

One of the tools suggested to us by the good folks at Harmony In Wood was a router with a good ball bearing round-over bit.  The router spins the round-over bit very rapidly, and cuts off the square corner of a block of wood, and makes it round of course, and as long as you keep the bit sharp, and the wood moving in the correct direction, very smooth.  Some  times a bit of extra hand sanding was helpful!  The round-over bit, and the resulting shape of the edge is shown below.  The ball bearing shown at the top of the bit, holds the bit exactly the right distance from the piece of wood, and moves smoothly along any curved or straight line, even including the inside of the drilled hole for the window!  Moving in the correct direction with the grain of the wood is important because if you are traveling against the grain, the bit may lift off a large chip, or maybe just leave a rough edge?  As mentioned earlier, after the first hundred or so, the eye gets the knack of figuring out which direction to move the wood for the best results on each piece.  As with all woodworking tools, keeping your tools sharp gives better results, and shortens the amount of time spent sanding the final piece!

Above, our router is mounted upside down in a small metal table, and Elizabeth guides the body of the future Rolls Royce along the ball bearing, rounding over and smoothing the edges of the toy, making it much more comfortable to the touch for what ever child would soon enjoy our toy!
 Here is a better view of the router table - this one has a fence attached to push a straight board along instead of using a ball bearing bit to maintain the distance.  As is often the case in some of these pictures, while Elizabeth is wearing safety glasses, she should have also been sporting a dust mask.  Don is also missing some essential safety equipment is some of  these pictures!  Particularly with the very noisy router, some ear plugs or other ear protectors would have been nice!  Later, as I added employees to the mix, I became much more careful about safety equipment.  An accident that happened not too long after these pictures were taken also made me much more safety conscious!  I'm proud to say that over the 40 years or so, only one major accident occurred, and it was me that suffered that one.  More details in a future installment!

Saturday, May 9, 2015

Making it smooth! Harmony In Wood!

 First a really important story!  Our earliest toys were much more crudely made.  We had designed some neat stuff, but we didn't know much about the fine points of making our things smooth and polished!  Fortunately for me, one of my very first "sales" calls fixed that!  I had stopped in Pittsford, NY at a very nice shop called Harmony In Wood.  As I arrived with my cardboard box of toy samples, Carol and Marko - owners - were sitting on a bench in front of the store.  They were very sooty, dirty, thirsty, and obviously not in any mood to talk to a salesman! They were taking a break from cleaning up after a fire that had happened the night before! I tried to quietly take my leave, but Marko said that he would love to look at my toys!  I spread out my toys in the dirt driveway in front of the store, and Marko and Carol carefully examined them.  After some time, Marko began to talk, and in summary, he basically told me I had some great designs, but that my craftsmanship was terrible.  I remember him being a bit more graphic than "terrible".  However, to my everlasting wonder, Marko then proceeded to give me a short but well organized lesson in how to properly finish my work!  He told me about sanders like the ones shown in this post, and about the router shown in the next post, and about the mineral oil that I will tell you about later.  His encouragement about my designs gave me the courage to go on with this crazy enterprise, and his lessons in craftsmanship made our work truly good!  Marko and Carol, told me to go home and "finish" my work, and that they would buy it when I returned.  I did that, and they were as good as their word, and they often reinforced that early quality lesson, as they fairly regularly sent back pieces that we had not done up to their standards.  Carol and Marko were centrally responsible for the success of The Toycrafter, and Harmony In Wood was my longest steady customer.  I learned to make every toy to pass the Marko and Carol test!  Harmony In Wood went out of business recently, but they out lived The Toycrafter!

Above and below, Elizabeth carefully sands the sides and bottom of the Rolls Royce, and lightly "rolls" over the edge between the sides and bottom.
Below, Don uses the 1 inch wide vertical belt sander to work on the edges, making them smooth like Marko and Carol wanted them to be.  They were right - they looked a lot better! Just a side note that we used our income tax refund for that year to buy the $69 vertical belt sander!